Raspberry Ripple Cake
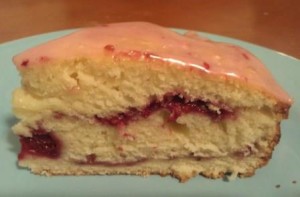
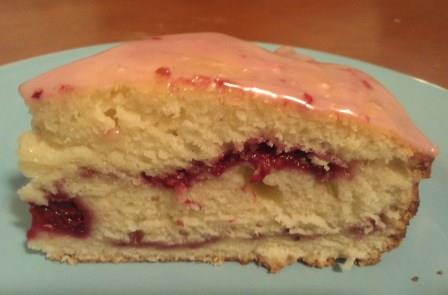 It’s another gray day in the Bay Area, so I needed something bright to cheer me up. Raspberry Ripple Cake did the trick. It’s the perfect treat for a dreary afternoon. It’s a fairly simple Sour Cream cake, but it has layers (ripples) of tart Raspberry running through it. Since it uses frozen Raspberries, you can make it mid-winter without paying the earth for berries flown in from a warmer climate.
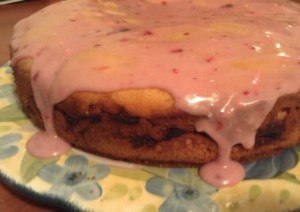
Now, it kind of looks a bit messy while you are making it… but never fear! It will bake up beautifully. And the pretty pink icing (colored with Raspberry Juice) will make you smile.
Invite a friend, pour a cup of coffee, and share some Raspberry Ripple Cake. It will brighten your day.
Ingredients-
2 cups Frozen Raspberries (thawed enough so they are mushy) (reserve some juice)
½ cup Butter
1 cup Granulated Sugar
3 Eggs
2 cups Flour
2 tsp Baking Powder
1 cup Sour Cream
Icing-
1 Tbl. Melted Butter
1 cup Powdered Sugar
Instructions–
Preheat oven to 350 degrees Fahrenheit
Grease the bottom of a 9” Springform Pan. If you don’t have a springorm pan, you can use a regular 9 inch pan… but DO line the bottom of the pan with parchment paper and grease the sides of the pan well.
Put the Raspberries in a bowl… let them thaw until they are soft enough to mush with a fork or potato masher. Set aside.
Combine the butter and sugar in a mixer and beat until light and fluffy-ish (it’s not going to be super fluffy, shoot for lightened… about 4-5 minutes).
Scrape down the sides, don’t forget the bottom under the beater.
Add the eggs one at a time, beat after each one.
Combine the flour and baking powder in a small bowl.
Alternate adding the flour mixture and the sour cream to the butter mixture.
So, with mixer on low… add some flour, add some sour cream, add flower, add sour cream… scrape down sides then add the rest. Beat until completely combined.
Scrape sides and bottom…. Beat until it’s all mixed up.
Save a few spoonfuls of the juice from the mushed raspberries.
Now… spread 1/3 of the batter into the pan. It seems like it won’t work, but it will… get to the edges.
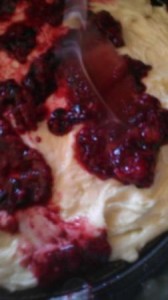
Spread ½ of the mushed raspberries over the batter.
Here’s where it gets tricky…
Spread another 1/3 of the batter over the raspberries. It might get a little mixed up… do your best to keep it layered. I find that if you drop blobs of the batter all around, then spread it, it’s easier than plopping it all in the middle.
It’s better to have batter touching the edges than raspberry… but don’t panic if you can’t do that.
Spread the rest of the raspberries on…
Now spread the last of the batter over it all.
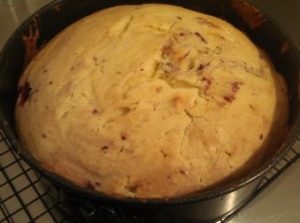
Bake for 50 minutes.
If you stick a toothpick into the cake, it should come out clean.
Let cool on a wire rack until completely cooled.
Prepare the Icing
Combine the melted butter, powdered sugar and reserved raspberry juice in a bowl. Stir until smooth. If it feels too stiff.. add a teaspoon of milk.
Remove the cake from the pan… set it on the serving plate.
Pour the Icing over the cake…. It won’t cover the sides, but it will sort of drip down a bit.
Slice and eat.
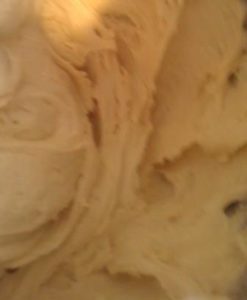
The batter will look like this when it’s ready. Spread 1/3 of the batter into a prepared springform pan or a 9 inch cake pan lined with parchment paper.
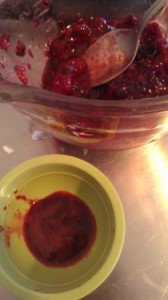
Reserve some Berry Juice after Mashing the Raspberries.
Spread 1/2 of the mushed frozen Raspberries over the batter. Then add more batter, more raspberries… then the final layer of batter.
Bake 50 minutes… then cool completely.
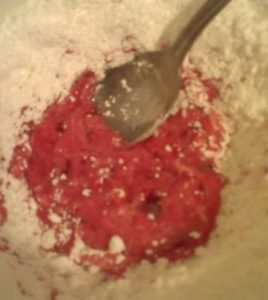 Combine the reserved Raspberry Juice and Powdered Sugar….add milk if it looks too stiff, and more sugar if it’s too liquid. It should look like pink Elmer’s Glue.
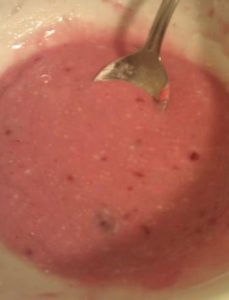
Like this….
Drizzle the Icing over the Cake




Comment(1)