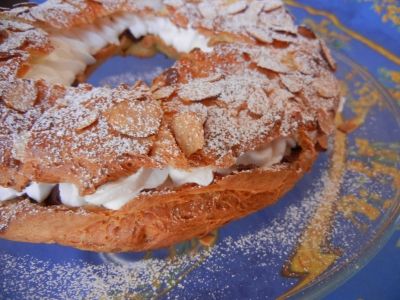
Paris Brest Cake Recipe (with Step by Step Photos)
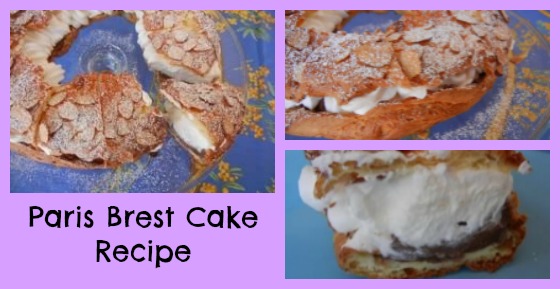
The Paris Brest Cake is one of those “flashy” desserts that don’t require as much effort as you think. It’s a simple choux pastry filled with chocolate and whipped cream. Like a giant cream puff….Swoon…
And I deserved it!
You see, my birthday came and went in a flurry of everyday family chaos… however….. when you are ‘this many fingers’ old, sometimes it’s best not to shine too strong a light on these things. Now, I may not want a party and candles (seriously, we’d need a permit from the fire department), but I absolutely must have a birthday cake.
Part of the problem with being the family baker is that no one else wants to try and bake me a cake….sigh….
I turned to Jacques Pepin. (He and I go way back.) I spent many a Saturday morning watching him on PBS and taking notes. With his comforting voice, and his easy way of teaching, I learned a lot about cooking from him. Who better to bake my cake?
OK, slight hitch… the man lives a few thousand miles from here… (and he probably wouldn’t be baking a cake for me if he lived next door)… so I had to make my own. I did use his recipe though.
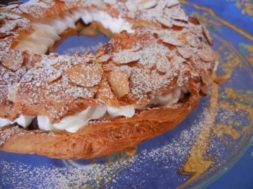
The Chocolate Paris Brest Cake is a choux pastry ring filled with chocolate pastry cream and rum flavored whipped cream. MMMmmm. Now, the number of steps and ingredients may look daunting, but fear not! Follow the steps, I’ve included photos to make it simple, and you can do this (heck, I did it).
The recipe has 3 parts… the Choux Pastry Ring, the Chocolate Pastry Cream, and the Rum Flavored Whipped Cream. It’s like a big, circular cream puff filled with chocolate, and everyone gets to share it with you…. unless, of course… you decide you don’t want to share (find a safe spot, and eat that cake yourself).
You mix the batter for Choux pastry on the stove top. I used Jacques Pepin’s food processor assist… but you can actually work it with a whisk and some serious elbow grease. (Think of it as the workout penance before the cake). The dough is piped into a ring (like a bicycle wheel), then sprinkled with almonds before baking.
The Chocolate Pastry Cream is made on the stove top too…. it’s a dark, rich, not-too-sweet chocolate cream. (Now, if you are overwhelmed at the thought of making the chocolate pastry cream, you could probably use your favorite chocolate pudding.)
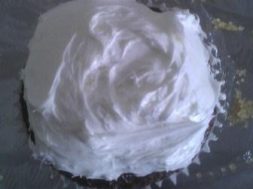
Finally, the rum-scented whipped cream. A little sugar and a little rum go into the cream… and it’s whipped up to a fluffy yumminess, then piped over the chocolate.
Chocolate Paris Brest Cake
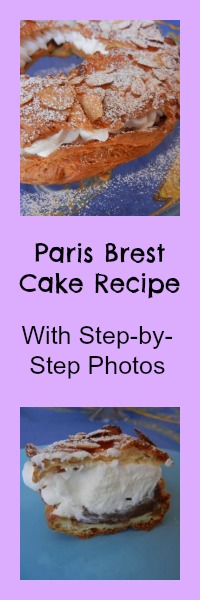
Paris Brest Cake Recipe with Step by Step Photos
The Chocolate Paris Brest Cake should be eaten on the day it is made... after that, the whipped cream gets hard, and the pastry gets tough.You can make the chocolate filling in advance, and the cake in the morning.... whip the cream and fill the cake shortly before serving.
Ingredients
CHOUX PASTRY RING:
- 3/4 cup Milk
- 3 TBL Butter (don't use margarine)
- 1/2 tsp Granulated Sugar
- 3/4 cup Flour
- 3 large Eggs
- 2 tsp. Sliced Almonds
CHOCOLATE CREAM:
- 2 large Egg Yolks
- 1 1/2 TBL Flour
- 2 TBL Granulated Sugar
- 3/4 cup Milk
- 4 oz. Dark Chocolate
WHIPPED CREAM:
- 1 cup Whipping Cream
- 1 TBL Rum
- 1 1/2 TBL Granulated Sugar
TOPPING:
- 1 tsp Powdered Sugar
Instructions
- Preheat oven to 375 degrees Fahrenheit
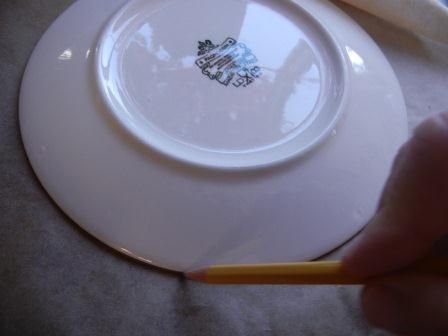
- Draw an 8 inch circle on a piece of parchment paper (I just traced around a plate) then flip the paper over and put it on a cookie sheet. Make sure you can still see the circle (you just don't want to pipe pastry on ink)
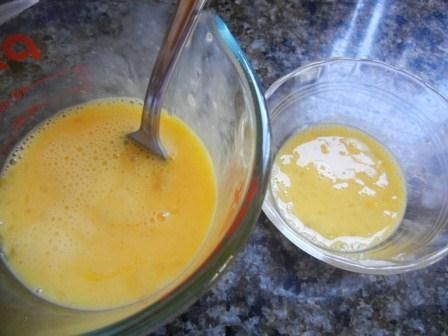
- Whisk the 3 eggs in a small bowl... take a tablespoon out and put it in a smaller bowl... set the egg aside.
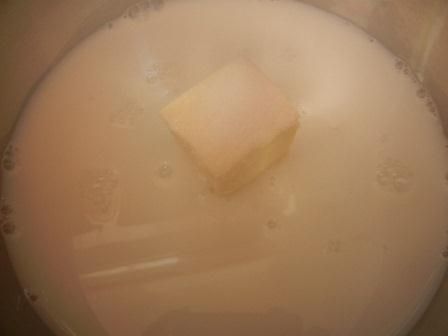
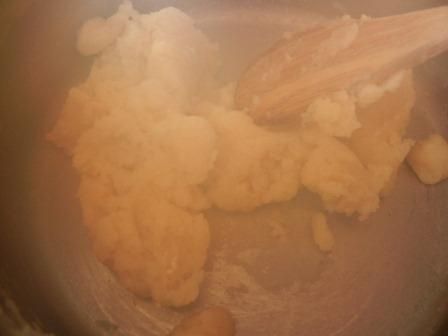
- In a medium saucepan, combine the milk, butter and sugar.... bring to a boil over medium heat (you want to stir it until the butter is melted). When the mixture is boiling, pull it off of the heat, and dump in the flour. Stir hard with a wooden spoon until combined. Put the pot back on the heat. Keep stirring for 20 seconds. The dough should be lumping up and pulling away from the sides.
- Here is where you get to make a decision....
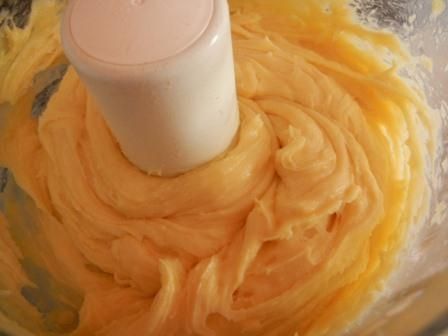
- If you have a food processor, dump the lumpy stuff into the bowl and let it sit and cool for a few minutes. Then turn on the processor, and pour in the bigger bowl of eggs. Process until the dough is smooth... no lumps, no goo.
- If you DON'T have a food processor..... let the lumpy stuff cool a bit, add eggs, and whisk until it is smooth.
- Put the batter into a piping bag fitted with a large round tip. A 3/4 inch tip is perfect... unfortunately, someone wandered off with mine (grrrrr)... so I used a 1/2 inch tip (just maybe pipe an extra circle).
- Pipe a circle of batter, using the circle you drew as an outline. (yes, feel free to wing it... my circles come out too wobbly looking for that). Then pipe another circle inside the first. DO NOT START AND END IN THE SAME SPOT. The cake will come apart as it bakes... and while, the entertainment value is high, it means you will have to begin again.
- After piping the circles, pipe another circle on top of those circles.
- Now, take the reserved tablespoon of egg, and, using a pastry brush, brush it all over your circles (this will make it brown up nicely).
- Use a fork to make a crosshatch pattern all over the pastry dough. You want to erase the seams.
- Sprinkle the round with sliced almonds
- Stick it into the 375 degree oven for 20 minutes.
- After 20 minutes drop the temperature to 350... bake for another 35 minutes. Keep an eye on it... if the ring starts to get too brown, just cover it loosely with a piece of aluminum foil.
- When the timer goes off.... turn off the oven, open the door a bit...but leave the ring in the oven for another 30 minutes. This will allow the moisture to evaporate.
- Then take it out of the oven and let cool completely before filling.
- Meanwhile... make the CHOCOLATE FILLING
- In a medium bowl, combine the egg yolks, sugar and flour.... whisk until you have a yellow goo.
- Get out your saucepan (you did wash it after making the pastry dough....right?) Heat the milk to boiling over medium heat.
- Pour the boiling milk over the egg/flour/sugar mixture in a steady stream (don't dump or you'll have scrambled eggs).... whisking fast all the while. When the milk is fully incorporated, pour the mixture back into the saucepan, and bring back to a boil... whisking CONSTANTLY...let it boil for 10 seconds, and pull off the heat.
- Add the chocolate a few bits at a time... whisk in... add more.... whisk in... add more.... until all the chocolate is in, and smooth.
- Pour the Chocolate Filling into a bowl, and set aside to cool.
- Where are we now.... Pastry cool? Chocolate cool?
- Time to whip up the Cream.
- Finally we get to use the mixer... put the whipping cream, rum and sugar into the mixing bowl, and whip it up until you have stiff whipped cream. You might want to taste it to make sure it's good.... yum... now taste it some more, because it's GOOD.
- SOME ASSEMBLY REQUIRED
- Take the Cake round that you baked, and with a serrated knife, cut off the top part. You want it to take off about a 1/2 inch lid.
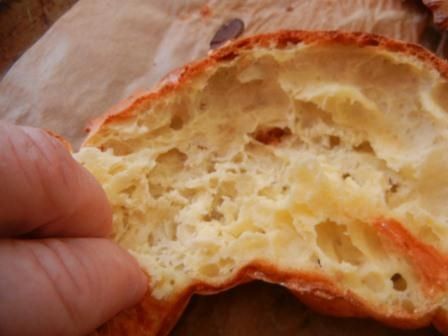
- Use your fingers to pull the dough out of the bottom part.
- Put the bottom cake part onto your serving plate.
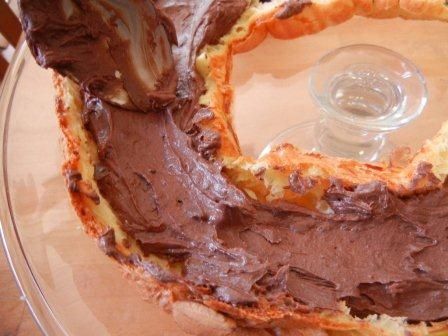
- Use a spoon to fill the bottom cavity with chocolate filling. Smooth it out.
- Put the whipped cream into a piping bag fitted with a 1/2 inch star tip (that's the bigger one... if you don't have a star, round is ok.)
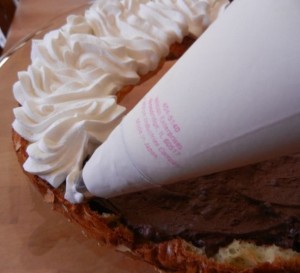
- Pipe the whipped cream over the chocolate... kind of go back and forth to the edges.
- Now, the pastry is a bugger to slice through when the cake is assembled... it mushes down, and spoils the look of the cake. We're going to work around that in a very simple way.
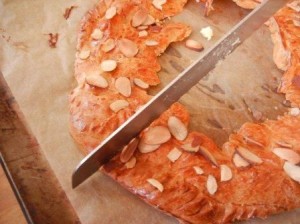
- Put the top round on a cutting board.... cut 8 to 12 pieces (sort of leave the pieces in the circle shape) then transfer the top pieces in order onto the whipped cream. See? pre-sliced! you just have to go through the bottom.
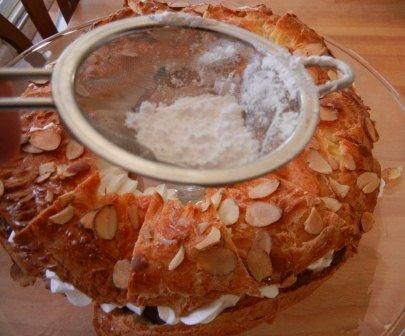
- Finish the cake by sprinkling it with powdered sugar. I find it easiest to put the powdered sugar in a small strainer, and then I shake it over the cake.
- Done... Serve and Enjoy!
Step By Step Photos… You CAN do This!
Draw A Circle on Parchment about 8 inches in diameter… then flip the parchment over
Whisk the Eggs and Set a Tablespoon of it into another Bowl
Bring the Milk, Sugar and Butter to a Boil over Medium Heat
Dump in the Flour all at Once, and Stir to combine
It Will Pull Away From the Pan and Look a Bit Lumpy
Put into the Food Processor, Let it cool a few minutes
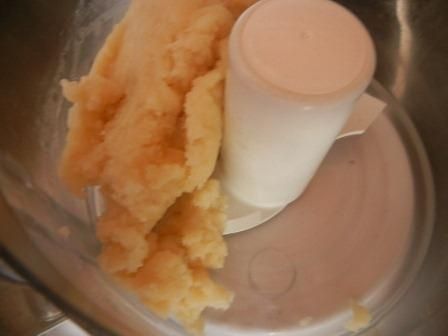
Process the Eggs and the Lumpy Dough (Alternatively, whisk the heck out of it.)
Batter is Done When It Looks Like This-Sort of Smooth and Sticky
Fold Over the Top Edge of the Piping Bag-Fill the Piping Bag with Batter
Gather the Top of the Bag and Give it a Twist to Make Sure there’s no air in the bag
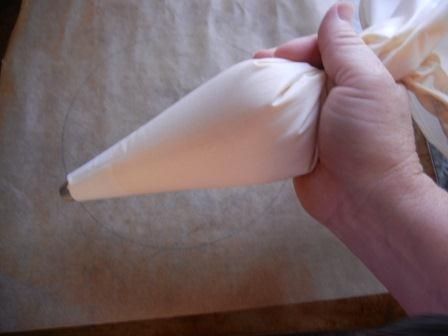
Pipe Your First Circle Following the Line, then Pipe the Second Circle inside the First… START IN A DIFFERENT SPOT
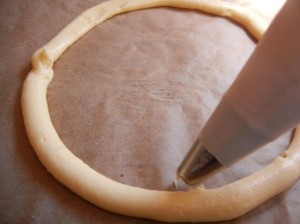
Pipe a Third Circle Over the Top of the Other Two
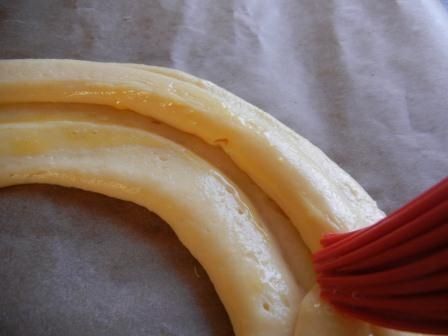
Brush the Egg Wash Over the Top of the Circles
Use a Fork to Make a Cross Hatch Pattern On the Dough Round
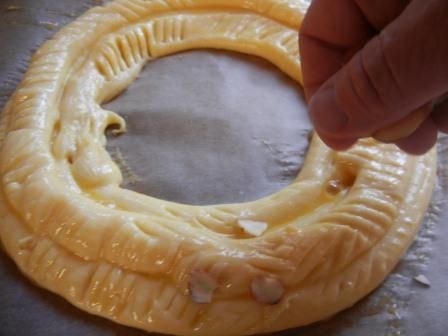
Sprinkle with Almonds
Bake 20 minutes at 375… then 35 minutes at 350
Let Rest in the Oven for 30 minutes… cool on the sheet
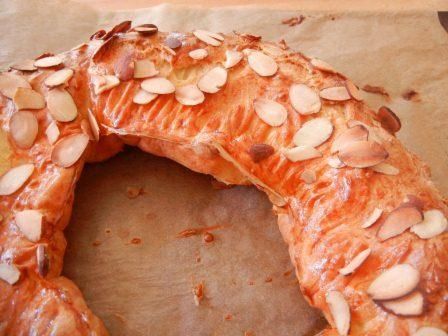
Cut the Top of the Round Off
You want to go down about a 1/2 inch
So now you have a top bit, and a bottom bit
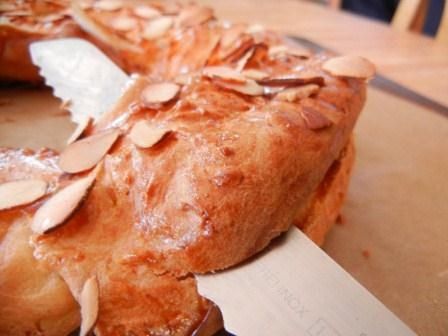
Use Your Fingers to Pull out the Excess Dough
You Want to Leave the Shell, but you don’t have to go nuts some cake is ok
Spoon the Chocolate Filling Into the Bottom Part
Smooth it out a bit
Pipe on the Rum Flavored Whipped Cream
Go Side to Side… Cover the Chocolate
Cut the Top Round into 8 to 12 Pieces
However many pieces you want… that’s what you cut…. so, you could just cut it in 2 if you want.
Set the Pieces Onto the Whipped Cream (Keep them in Order)
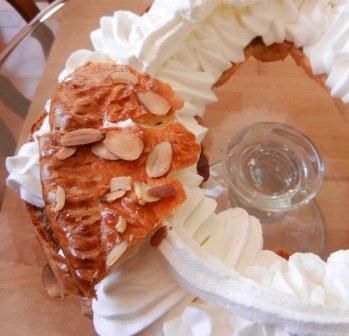
Use a Strainer or Sieve to Dust with Powdered Sugar
Done
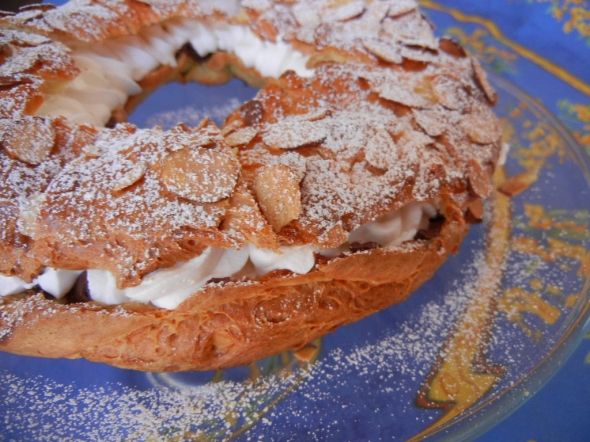
To Cut a Piece, Slice between the Cut Bits on top, and through the Pastry on the Bottom with a Serrated Knife
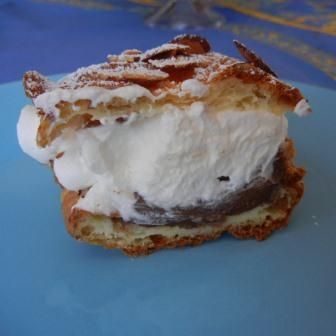
Now EAT
Ateco Pastry Decorating Tip, Set of 3 BRAUN FP3020 12-Cup Food Processor Ultra Quiet Powerful European made With German Engineering includes 9 Attachment plus Bonus Mini Processing Bowl
 Kirkland Signature Non Stick Parchment Paper, 205 sqft
&
